Wednesday, March 12, 2008

The Opening Campaign


The Commanders
Don Fernandez Gonsalvo de Caracciola y Villigers, Duke of Sesa (1585 – 1628) is a veteran soldier who was competent, experienced, but un-enterprising, he had been on Spinola’s staff in Flanders. His recent appointment to hold the Palatinate was his first independent command.

Manfred Georg, Margrave of Uslar (1573 – 1645) is an important Protestant prince and zealot. Lacking experience, he was a well-read military theorist and had been chief of cavalry for the Protestant Union. After the Union collapsed, he raised his own force and joined the Swedes to support the cause. Given his own command, he marched off to the Palatinate to cut the Spanish Road which supplied the Imperialists with troops and supplies from Italy through Germany and on to the Netherlands.

The Imperial Corps
Overall Commander: Caracciola (Average)

Right Wing: Duke Anholt (Average)
Merode ARK 200 men; Walloon
Eynatten KUR 200 men; Imperial
Des Fours KUR 200 men; League
Nivenheim KUR 200 men; Imperial

Center: Cordoba (Average)
Caracciolo IR 1.200 men; Imperial
Herliberg IR 1.200 men; League
Schoppe IR 1.200 men; Imperial
Schmidt IR 1.200 men; League
Verdugo IR 1.200 men; Spanish
12 Medium and Heavy Artillery pieces

Left Wing: Lindelo (Average)
Losada ARK 200 men; Walloon
Lindelo KUR 200 men; Imperial
Baden KUR 200 men; League
De Magni Forlorn Hope 200 men; Imperial

The Swedish Corps
Overall Commander: Uslar (Poor)

Right Wing: Ruthven (Average)
Baudissin ARK 200 men; German
Soop Horse 200 men; German
Mitzlaff IR 1.200 men; Scottish

Center: Saxe-Launenburg (Average)
Kagge IR 1.200 men; German
Moen IR 1.200 men; Swedish
Baner IR 1.200 men; Swedish
6 Medium and Heavy Artillery pieces

Left Wing: Knyphausen (Average)
Thurn IR 1.200 men; German
Silversparre Horse 200 men; Swedish
Stalhansk Horse 200 men; Swedish

The Opening Moves
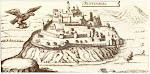
The campaign opened with Uslar advancing his Corps into the Palatinate closely watched by Caracciola. The intent of Uslar was to smash the Spanish/Imperialist corps to end the campaign quickly. Advancing along the Nidda River, Uslar decided to capture the Imperial stores in Reichling to shore up his weakened supply line. Caracciola, knowing Uslar’s weakened supply situation from his spies, blocked Uslar’s advance on Reichling at Desfurs Bridge. Caracciola was only able to bring half of his field guns having left the larger pieces in Reichling and had difficulties supplying the rest of the troops due to muddy roads near Reichling.

The Action at Desfurs Bridge

The Action at Desfurs Bridge, July 10, 1628
Caracciola set up his blocking force at Desfurs Bridge and waited for Uslar’s advance. Once Uslar reached the blocked bridge, he stopped and organized his troops. The day of battle opened with an unusually warm day with the sun at Uslar’s back. This was an advantage for the Swedes who were able to stop and rest at noon whereas the Imperial forces remained in line of battle which they had been in since the early morning. Uslar divided his force into cavalry wings and a center. Ruthven lead the cavalry left wing while Knyphausen lead the right wing. Saxe-Launenberg commanded the infantry center.

Caracciola mirrored the Swedes with cavalry wings and an infantry center. His center was commanded by Cordoba and the tercios were staggered in along the base of the hill in front of the Desfurs Bridge.

The first phase of the battle opened with ineffectual Swedish artillery fire which lasted for roughly a half hour before the Scot,Ruthven, advanced the Baudissin and Soop Horse on the Swedish left to contact. At the same time, Saxe-Launenberg advanced the center to deliver a crushing volley which shattered the De Magni Dragoons who had been the Forlorn Hope of the Imperial forces and cleared the Imperial artillery.

This second phase of battle saw the Swedes continued to advance finally masking their guns. The advance went past the corpses of the De Magni troopers and the abandoned Imperial guns, to deliver further volleys into the Imperial Caracciolo, Schmidt and Verdugo tercios. Both Caracciolo and Verdugo tercios were discomforted by the musket fire. Still the tercios waited for the orders to advance. Finally the waiting became too much for the Verdugo tercio which broke into a mob and fled the field.

On the Swedish left, Ruthven’s troopers broke through the Losada Cuirassiers to threaten the bridge. Lindelo, the imperial commander on the left, lead his troopers to stem the breach leaving only the Baden Cuirassiers to stand between the Swedes and their main objective.

The third and final phase of the battle began with the men of Verdugo fleeing to the rear. Both the Duke of Sesa and his sub-commander, Cordoba, tried to stem their retreat. Shots were fired and both Generals fell. This threw the Imperial center into disorganization and confusion as there now was an absence of formal command. Troops slowly began to trickle to the rear. While the center dissolved into confusion, the Imperial cavalry on the left wing, under Duke Anholt, advanced into contact. The Swedes, unlike the Imperials, held and a swirling cavalry melee ensued.

In the center, the Swedes continued to delivered sharp volleys which disorganized the remaining steadfast Herliberg and Schmidt tercios. With two more crushing volleys, the Swedes saw the Herliberg tercio collapse and the center’s gradual retreat became a flood as the tercios broke into masses of men. The Imperial cavalry wings tried to stem the advance but only managed to screen the retreating forces. During this final phase, Lindelo, the left wing Imperial commander was mortally wounded.

The aftermath of the battle saw Uslar not pursue his crushing victory. The firepower of his Swedish brigades combined with the lack of action by the Imperial tercios crushed the Imperials and destroyed much of their command structure. Only the Duke Anholt survived the battle and he was only able to organize a handful of troops at Reichling. Taking these troops and the garrison, he fled Reichling to Klintzingen to reform his army.

Imperial troop losses & notes
Merode ARK 100 men
Eynatten KUR 10 men
Des Fours KUR 60 men; Des Fours killed
Nivenheim KUR 10 men; Nivenheim mortally wounded
Caracciolo IR 100 men; Caracciolo killed
Herliberg IR 600 men; Cordoba killed
Schoppe IR 400 men
Schmidt IR 300 men
Verdugo IR 1.000 men; Verdugo mortally wounded
Losada ARK 100 men
Lindelo KUR 100 men; Lindelo mortally wounded
Baden KUR 20 men
De Magni Forlorn Hope 200 men; De Magni killed
Lost 6 medium and heavy artillery pieces

The Action at Klintzingen

The Action at Klintzingen, August 30, 1628
Hans Georg, Duke of Anholt, (1580 – 1628) was a veteran soldier who was a competent, experienced cavalry commander. Most of his experience came from his time spent with Tilly in Flanders.


At Klintzingen, Duke Anholt showed that while he was an average cavalry commander, he was totally unsuited to lead an army. He was careless with his forces and allowed Uslar to catch up to the Duke at Klintzingen only weeks after the engagement at Desfurs Bridge. Duke Anholt had only been able to reform and to reorganize a few of his original forces and was still weakened from the previous engagement. His force was roughly half the size of Uslar’s and did not include any artillery pieces as he still had not gotten any transport in Reichling and had abandoned the guns in the garrison. The forces available to Duke Anholt were:

Left Wing: Hameln (Average)
Eynatten KUR 200 men
Aston KUR 200 men; Formed from Des Fours and Nivenheim KUR

Center: Heilbronn (Average)
Anholt IR 1.200 men; Formed from remnants of Caracciolo and Verdugo regiments
Herliberg IR 1.200 men

Right Wing: Nordsee (Average)
Losada KUR 200 men; Re-formed from remnants of Losada and Lindelo KUR
Baden KUR 200 men

The battle opened much differently as Uslar ordered his cavalry to envelop the Imperial forces. On the Swedish left, the troopers advanced quickly and occupied Klintzingen on the far left of the Imperial forces. On the Swedish right, the cavalry advanced until almost engaged with the Losada and Baden cuirassiers. These cuirassiers loosened a couple of caracoles which surprised the Swedes and caused Silversparre’s troopers to rout after taking heavy losses. Silversparre was mortally wounded in this engagement. As the melee continued, the Imperials were able to rout the remaining Swedish cavalry from the table wounding Stalhansk in the process. After their success, the Imperial cavalry reformed for further action.

In the center, the Imperial tercios turned to clear the Swedes out of the village while the Swedish infantry advanced with caution.

The second phase of the battle saw the advance of the Imperial cavalry wings. On the right, after being outfoxed for Klintzingen by their Swedish counterparts, the Imperial cavalry regiments overran the German Mitzlaff IR and after caracoling, shattered the regiment with short sharp attacks.

The Imperial cavalry reforming on the left were caught by the Swedish infantry advance. The Swedes with a few well placed volleys shattered the cavalry killing both the wing commander, Hameln, and one of the regimental commanders, Eynatten, effectively destroying both cavalry regiments.

The final phase of the battle, the Imperial tercios succeeded in reaching Klintzingen and driving out one of the Swedish regiments. The Swedish regiment saw their commander, Baudissin, fall mortally wounded as the first of the two Imperial tercios, Anholt, advanced through Klintzingen. The second tercio, Herliberg, was caught by the Swedes just outside Klintzingen and was shot to pieces. As Duke Anholt turned back to rally the wavering troops, his horse was struck down and rolled over him leaving him severely wounded. With Duke Anholt down his troops fled the field. The Duke was brought to the safety of his carriage but died in the arms of his personal secretary en route to Reichling.

With two successive defeats, the Imperial cause looked bleak especially as they had lost successive generals in each of the battles they were engaged in. With the losses of the main commanders, the emperor decided to concentrate on areas other than the Palatinate but in a last ditch effort sent one of his most able commanders, Hohenzollern, to delay and frustrate Uslar.

The Action at Buchholz Hof

The Action at Buchholz Hof, October 15, 1628
Uslar continued his advance through the Palatinate and after his capture of Reichling and his victory at Klintzingen, he decided to concentrate his forces and to prepare for the winter. The Margrave did not expect the Imperials to re-organize and focused his energies on rebuilding and re-equipping his Swedish and German forces. The emperor, however, had other plans and dispatched a young, brilliant commander to thwart the protestant zealot, Uslar.

Manfred Stephan Georg Hohenzollern (1590 – 1650) was a much different commander than the previous Imperial commanders – he was seen as one of the up and coming commanders and his vast experience under Tilly soon was put to the test. Hohenzollern managed to rally a number of the shattered and scattered troops in the Palatinate to form a small but formidable force.

Left Wing: Silvester (Average)
Siebdruck KUR 200 men; Fresh recruits from the Palatinate
Aston KUR 200 men; Re-formed from Aston and Eynatten

Center: Heilbronn (Average)
Herliberg IR 1.200 men; Formed from remnants of Anholt and Herliberg regiments
Hohenzollern IR 1.200 men

Right Wing: Nordsee (Average)
Losada KUR 200 men
Baden KUR 200 men
Weiss KUR 200 men; Fresh recruits from the Palatinate

The gathering forces under Hohenzollern could not be ignored by the Margrave and, in early October, Uslar advanced to meet the rebuilt Imperial force. After a number of attempts at flanking each other the armies met at Buchholz Hof.


Unlike the previous engagements, the Imperials opened the battle by advancing their center against a gap between the Swedish Right wing and the center. The two tercios, Herliberg and Hohenzollern, advanced and crashed into the two Swedish brigades of Thurn and Baner. After a short melee which saw the Swedish brigades collapse, the tercios had effectively split the Swedes into two forces – the cavalry on the right wing and the rest of the Swedish force. On the Swedish right, the cavalry was caracoled by the Imperial cavalry which threw the Swedes into disorder. The rapid advance of the Imperialists had shocked the Swedes who had, after the Imperial debacle at Desfurs Bridge, assumed the Imperialists were of inferior quality. While Klintzingen had shown the effective caracole of the Imperial cavalry, the Swedes had never experienced the power of the tercio once it closed to melee. At Buchholz Hof, the strength of the tercio showed itself and the Swedes were now in serious trouble.

The second phase of the battle continued with the Imperial tercios rolling up the Swedish flank, under Knyphausen, overrunning the Swedish guns in the center. To stem the advance, the Swedes, under Ruthven, attempted to turn their troops to face the advancing tercios but were then threatened on the flank as the Imperial Right Wing advanced into caracole range disordering Mitzlaff’s brigade. The Swedish cavalry on the far left advanced to threaten the Imperial cavalry which effectively halted.

While the tercios continued to roll up the Swedish brigades, the Imperial left cavalry wing continued to caracole their Swedish counterparts who tried to muster the courage to charge home. However, with the tercios rolling up their comrades on the left, the Swedes bravely remained standing in their position unsure whether to advance or retreat. After a series of caracoles the Smaland Horse broke leaving the Stalhansk Horse to their fate. The Stalhansk Horse soon followed their comrades and routed from the field.

The final phase of the battle saw the Imperial tercios continue their advance until they contacted the Moen Brigade. Here the advance was stopped and the leading tercio, Herliberg, was routed. The Swedes, however, had seen enough and with their left flank destroyed, the general withdrawal started. The Swedish right wing covered the retreat of the remnants of the Swedish force. This was the first decisive defeat of the Swedes in the campaign.

After the battle both sides went into winter quarters to rest and recover from the campaign season. With both sides exhausted and the supplies low, the spring of 1629 was spent in minor skirmishes as the armies were rebuilt. In the early summer of 1629, the Imperials advanced against the Swedes in an attempt to drive out the Protestants from the Palatinate.

The Action at Kronhain

The 1629 Campaign
The campaign season began poorly for the Swedes who were caught still trying to rebuild their forces. At Neuenhain, the garrison under Mitzlaff along with two Horse regiments, Horne and Stalhansk, were forced to withdraw with the arrival of the Imperial army. The Swedes were forced to abandon some of the supplies that they had put together for the campaign season. This combined with the previous defeat at Buchholz Hof, depressed the Margrave who consolidated his forces at Welfens.

The Imperial forces under Hohenzollern, after their capture of the supplies at Neuenhain, also consolidated and advanced towards Welfens. The Margrave, hearing of the advance, resolved to attack the Imperial forces near Kronhain in the hopes of forcing a decisive defeat of Hohenzollern’s forces before the Margrave’s own forces revolted. The Swedish troops and their allies desperately needed a victory.

The Action at Kronhain, May 27, 1629
The Margrave, Uslar, managed to catch the Imperial forces as they were marching through Kronhain. The opening phase of the battle saw the Imperial cavalry quickly form on the outskirts of the town to attack the smaller Swedish cavalry wings on the respective flanks. The Imperial tercios, however, were bunched up in Kronhain and attempted to advance out of the town into the fields beyond to engage the smaller Swedish force.

The Swedes advanced on Kronhain hoping to defeat the Imperial forces in detail. As the infantry advanced, the skies darkened and the wind picked up. Seeing the Swedish infantry advance, the Imperial cavalry charged across the field to caracole the Swedish cavalry formed on the wings of the infantry. On the Imperial left, under the command of GM Silvester, the caracole was ineffective which allowed the Swedes to close within point blank range. As they caracoled, the Imperial cuirassiers, Weiss, took fire in the flank from the German Thurn IR. The shot was significant enough to heavily discomfort the cuirassiers. At this point, the Swedish cavalry charged into the mass of caracoling Imperial cavalry routing the three Imperial cavalry units, Losada, Weiss and Baden. During the melee both regimental commanders, Losada and Baden, were mortally wounded and taken from the field. With the rout of the cavalry, the Imperial left flank was effectively crushed.

On the Imperial right, under Nordsee, the Imperial cavalry caracole proved much more effective. The Hessian Arkebusiers, Horne, took heavy casualties before reforming. They with the Soop Horse charged into the first line of Imperial cavalry which was reloading. Like the left flank, the two Imperial cavalry units, Merode and Marzak, in the first line took heavy losses and routed. Marzak was killed outright by a Swedish saber thrust. The second line of two Imperial cavalry units, Aston and Siebdruck, then steeled themselves for the anticipated charge of the reforming Swedish cavalry.


In the center, the Swedes had an ineffectual exchange between their infantry and some Imperial medium guns located at the edge of the village of Kronhain. Both sides exchanged desultory fire with no one taking damage. While the Swedes continued their advance, the Imperial tercio, Hahn, advanced out of Kronhain and closed with the militia under Mitzlaff. After a short melee, the militia retreated a step but held their position in the Swedish line. Further on the Imperial left, the tercio, Themel, emerged from the forest and advanced through the Forlorn Hope and Hahn tercio disorganizing both. The tercio then attempted to re-organize before closing down on the widening gap between the advancing Swedish Baner IR and the Thurn IR, which had wheeled to fire on the advancing Imperial cuirassiers. The disorganized tercio crashed into the exposed flank of the Thurn IR forcing the Swedes to rout. The aftermath left the disorganized tercio, Themel between the Swedish centre and the victorious Swedish cavalry on the Swedish right wing.

With the collapse of the Imperial left wing and the right wing steeling itself for the next Swedish assault, the next phase of the battle began. This phase saw the Swedish centre continue to fire on the Imperial guns causing the gun crews to flee and abandon their guns. The next Imperial tercio, Herliberg, slowly emerging from Kronhain was also discomforted by the crushing Swedish volleys. As the volleys crashed, a flash of lightening lit the sky and a thundershower burst over the troops. The Swedish volleys petered out as the troopers tried to shield their matchlocks from the downpour. At this moment, the tercio, Herliberg, supported by the tercio, Westerbach, advanced and crashed again into the Swedish Brigade, Mitzlaff. This second attack broke killed Col. Mitzlaff and his men wavered, broke and ran from the field. Westerbach advanced and turned to threaten the Swedish Brigade, Kagge. Kagge had just been attacked by the tercio, Herliberg and was engaged in a fierce melee. Kagge managed to defeat Herliberg which broke and ran back into Kronhain.

On the wings of the battle, the Swedish cavalry was less bothered by the downpour. The victorious right wing crashed into the disorganized Thermel tercio routing the tercio which fled back into the woods into front of Kronhain. On the left, the Swedish troopers crashed into the second line of Imperial cavalry which could not fire because of the downpour. The Imperial cavalry was routed with Aston falling mortally wounded.
The victory on the flanks spelled the end of the battle as the Swedish cavalry remained on the field. The center had seen the advance of three Imperial tercios of which two had been beaten back. The final Imperial tercio, Westerbach, withdrew back into Kronhain. Then the three tercios, Westerbach, Hohenzollern, and Schmidt withdrew from Kronhain abandoning their baggage train and guns.

The defeat of the Imperial forces at Kronhain, lead the emperor to recall his commander, Hohenzollern, and the troops under his command. After this defeat, the emperor effectively abandoned the Palatine to the Protestants.

Many of the Swedish forces engaged at Kronhain were veterans of the 1628 campaign while the Imperial forces had been reformed and re-built after the late season victory at Buchholz Hof. The following highlights the losses taken at Kronhain and the status of the troops.

Imperial troop losses & notes
Merode ARK 100 men and was disbanded after the battle
Marzak KUR 200 men with its Inhaber, Marzak KIA; Recruited in the spring of 1629
Siebdruck KUR 200 men; Recruited in late 1628; Disbanded after the battle
Aston KUR 75 men; Aston mortally wounded; Reformed from veterans
Westerbach IR 100 men; Recruited in the spring of 1629
Herliberg IR 400 men; Disbanded after the battle
Hohenzollern IR 10 men
Schmidt IR 20 men
Themel IR 1.000 men; Recruited in the spring of 1629; Disbanded after the battle
Losada ARK 50 men; Losada mortally wounded; Disbanded after the battle
Weiss KUR 100 men; Recruited in late 1628; Disbanded after the battle
Baden KUR 200 men; Baden mortally wounded; unit destroyed
Hahn Forlorn Hope feld early with no losses reported; Recruited in the spring of 1629
Lost 6 medium and heavy artillery pieces

Swedish troop losses & notes
Horne ARK 100 men; Arrived from Hessen in 1628
Soop Horse 10 men
Mitzlaff IR 600 men; Mitzlaff KIA; Disbanded after the battle
Kagge IR 100 men
Moen IR 10 men
Baner IR 40 men
Thurn IR 500 men; Disbanded after the battle
Smaland Horse 20 men; Arrived from Sweden in late 1628
Stalhansk Horse 100 men

Wednesday, March 5, 2008

Campaign Comments

Comments on the Campaign
The whole campaign was solo-played using the map-less Piquet’s Theatre of War section. Each battle was fought after determining the forces present with some interesting surprises which I then explained in the context of the campaign. The description of the individual characters and the Orders of Battle owe much to William Gutherie’s two books on the Thirty Years War which stirred the juices and got me painting and playing with my TYW figures.

The opening campaign battle was a shock to me as many of the Imperial commanders fell when the Imperial side suffered from the lack of initiative typical of Piquet. I had expected a completely different turnout given the poor quality of the Swedish overall commander but Piquet’s initiative system made the difference. I like the system of initiative especially for solo games as it adds enough uncertainty so that one has the feeling one is turning the pages of a story, each phase of the battle is a new chapter and often very unexpected. That for me catches the essence of the solo game.